Table of Contents
- 1
- 2 How to Remove Plates from the Cuisinart WAF-300 Waffle Maker: A Deliciously Easy Guide
- 3 Getting to Know the Cuisinart WAF-300
- 4 Prepping the WAF-300 for Its First Use
- 5 Foolproof Plate Removal
- 6 Cooking Up Waffle Magic
- 7 Keeping the WAF-300 in Tip-Top Shape
- 8 Parting Thoughts on My Beloved Waffle Maker
Key Takeaways: Removing the Plates on the Cuisinart WAF-300
-
The Cuisinart WAF-300 waffle maker has removable waffle and pancake plates that are easy to insert and remove for cleaning and storage.
-
Before first use, wipe down the housing and plates and season the grids to prevent sticking.
-
To insert plates, open the lid, match the plate to either the upper or lower housing, align the pegs, slide in, and push down until they click.
-
To remove plates, press the release button on the side, plates will pop up, then slide out from holes and lift out.
-
Allow plates to cool completely before handling. Wash them in the dishwasher.
-
Store the WAF-300 upright with plates inserted and cord wrapped. Order replacements if needed.
-
Follow tips like preheating, using 1 1/2 cups batter, and spreading it evenly for waffle success.
-
With easy plate removal, the WAF-300 can quickly switch from waffles to pancakes for breakfast versatility.
How to Remove Plates from the Cuisinart WAF-300 Waffle Maker: A Deliciously Easy Guide
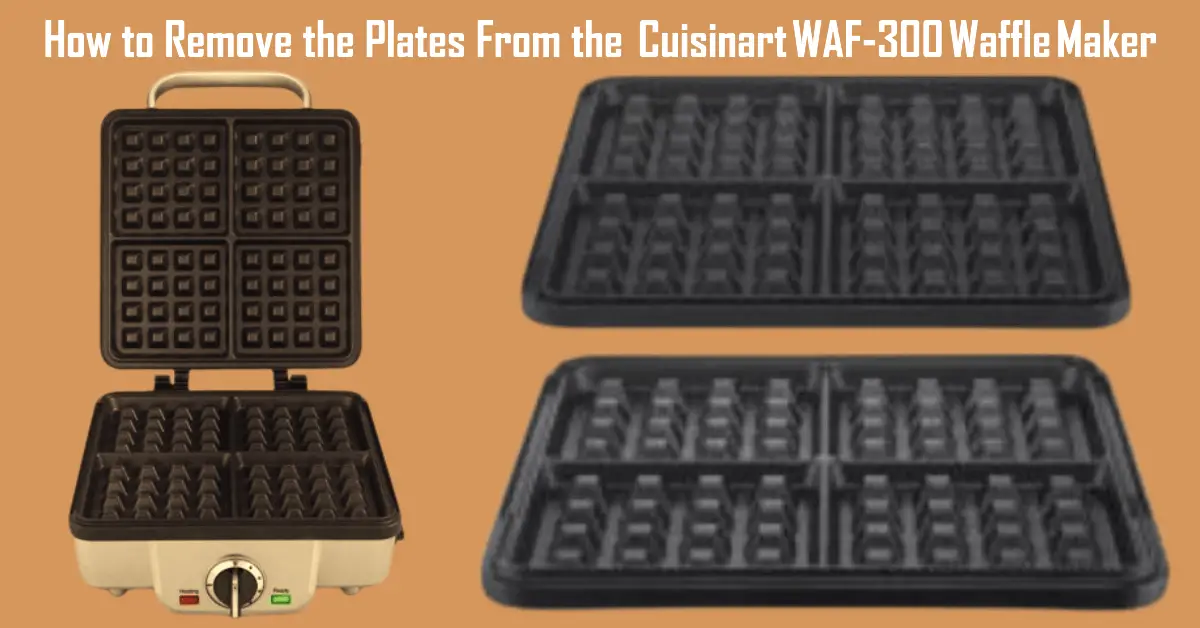
As a longtime lover of weekend brunch, I was really happy when I unboxed my brand new Cuisinart WAF-300 waffle maker. This sleek stainless steel appliance can churn out restaurant-quality Belgian waffles and fluffy pancakes with ease. But like any prized kitchen tool, proper care and maintenance will keep this baby cranking out perfect waffles and pancakes for years to come.
One key task is knowing how to remove the plates from the Cuisinart WAF-300 Waffle Maker. Whether you need to clean up batter drips or swap out waffle grids for pancake plates, detaching the removable plates is really easy once you know how. I’ll walk through everything you need to know about the parts of the WAF-300, prepping for first use, and the simple steps to pop those plates out. I’ll also share my tips for waffle-making success and storing it upright to save precious counter space.
I’m serving up a steaming stack of knowledge so you can master your machine and wow your weekend guests with your impressive skills. Nothing starts the day like warm waffles on a Saturday morning!
If you want to make thinner and crispier waffles than the thick, fluffy waffles made by the Cuisinart WAF-300, then I recommend that you read this article about the top rated thin waffle makers with removable plates.
Read these articles to learn about how the All Clad compare to the Breville waffle makers and the easy to clean All Clad removable plate waffle makers.
Getting to Know the Cuisinart WAF-300
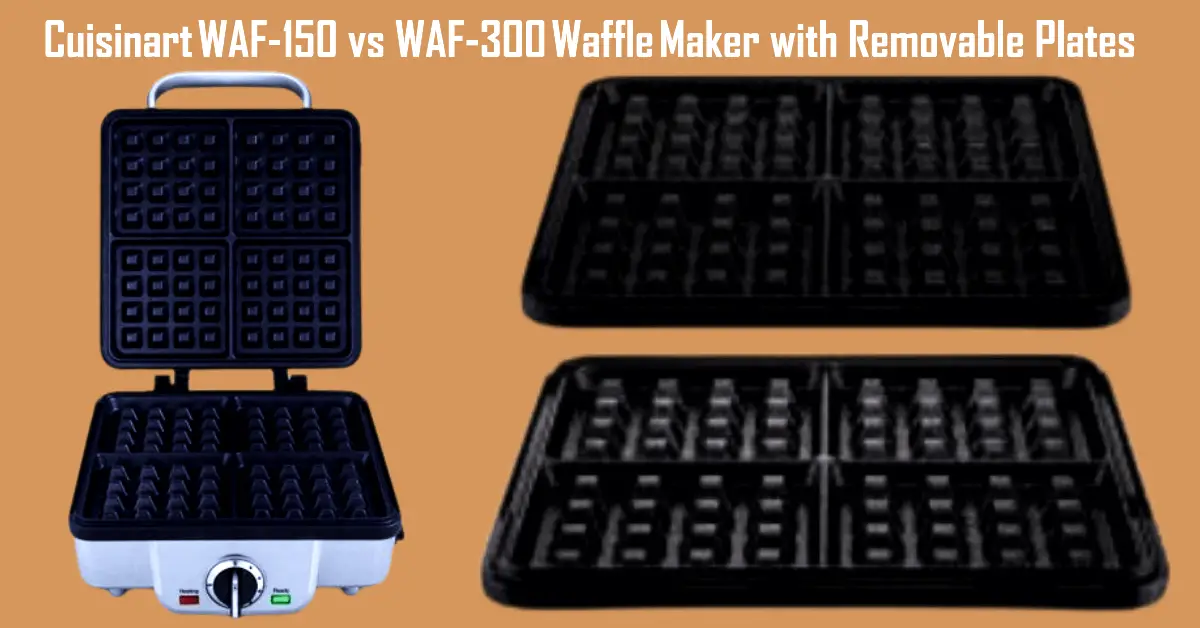
The Cuisinart WAF-300 removable plate Belgian waffle maker may look like your average stainless steel appliance from the outside, but inside it’s a waffle-making workhorse! So let’s take a look at all of its parts and features.
Key Parts and Features
Here are the highlights of the WAF-300’s design:
-
Housing – Brushed stainless steel with a cool embossed Cuisinart logo so everyone knows you’ve got a premium appliance.
-
Lid and Handle – No burning your fingertips! The handle stays cool while you lift the lid to check your waffle’s progress.
-
Removable Plates – The real stars of the show. More details below!
-
Temperature Knob – Dials in the ideal heat from 1 (light) to 6 (dark) so your waffles are golden brown, not burnt.
-
Indicator Lights – An LED lets you know when the power is on (red) and when it’s preheated (green). No more waffle surprises!
-
Audible Tone – Cuisinart kindly lets you know when it’s preheated so you don’t burn down the kitchen.
-
Cord Storage – Keep your countertop clutter-free by wrapping the cord in the back. Nice design touch!
-
Rubber Feet – No slipping and sliding on the counter while this thing does its waffle magic.
-
Tongs – Flip hot waffles straight from the grids. No need to risk burned fingers!
The Heart of the Matter: Removable Plates
The removable plates make the WAF-300 so versatile. Here’s how they work:
-
Waffle Plates – 4 plates shape 4-slice Belgian waffles. They’re marked “upper” and “lower” so assembly is foolproof.
-
Pancake Plates – A 4-slot bottom plate and flat top plate. Again, marked “upper” and “lower” for easy matching.
Being able to pop out the plates makes cleanup a breeze and storage slimmer. But the best part? Quickly switching between waffle and pancake plates when I’m craving both!
| Feature | Waffle Maker? | Pancake Maker? |
|---|---|---|
| 4 Removable Plates | Yes | No |
| 4-Slice Waffle Plates | Yes | No |
| 4-Slot Pancake Plate | No | Yes |
| Flat Pancake Plate | No | Yes |
Prepping the WAF-300 for Its First Use
Got my new waffle maker out of the box? Time to get it ready for waffle magic!
Remove Packaging and Clean
First things first – rip off all those sticky labels and get rid of any ties or twist ties. Check that all the parts are there before recycling the box.
Give the housing and plates a good wipe down with a damp cloth to remove any dust from shipping and storage. Don’t want that in my waffles!
Season the Grids
The nonstick coating on the plates works best if you season it first. I lightly coat both top and bottom plates with cooking spray or a tiny bit of flavorless oil. This helps ensure the batter won’t stick on the first go.
Now it’s ready to plug in and heat up!
Safety Tips
A few quick reminders before cooking:
- Locate the nearest fire extinguisher, just in case.
- Clear any clutter around the machine.
- Make sure kids and pets keep their distance during use.
- Never leave the WAF-300 unattended while powered on.
Okay, time for the fun part – let’s make some waffles!
Foolproof Plate Removal
Removing the plates is a cinch once you know the secrets. Here’s the inside scoop.
To Insert the Plates:
-
Open the lid completely until it locks into place at a 105° angle. This gives you full access to the plate housings.
-
Locate the embossed “UPPER” and “LOWER” markings on the right side of each plate.
-
For the waffle plates, match the upper plate to the top housing and the lower plate to the bottom housing.
-
For the pancake plates, match the flat plate marked “UPPER” to the top housing and the 4-slot plate marked “LOWER” to the bottom housing.
-
Pick up one plate and locate the two small pegs on the back edge.
-
Tilt the back of the plate up and line up the pegs with the two holes in the back of the housing.
-
Once aligned, slide the plate underneath the holes while keeping it tilted.
-
When the plate is partially inserted, gently push down the front end until the plate lays flat and “clicks” securely into place.
-
Repeat steps 5-8 for the second plate.
-
Check that both plates are fully inserted before closing the lid.
To Remove the Plates:
-
Locate the two plate release buttons on the right side of the housing.
-
Press firmly on the button closest to the plate you want to remove. You should hear a click.
-
The plate will pop up slightly from the base when released.
-
Grab the plate with both hands, one on each side.
-
Tilt the plate upward and slide it out from the holes in the back of the housing.
-
Once clear of the holes, lift the plate completely out of the base.
-
Press the second release button and follow steps 4-6 to remove the other plate.
-
Check that no residue or batter remains on the plates or in the housings.
Removing plates takes seconds once you get the motions down pat. Now for the best part – making breakfast!
| Task | Steps |
|---|---|
| Insert Plates | 1. Open lid 2. Match plates to housing 3. Line up pegs with holes 4. Tilt, slide in, press down |
| Remove Plates | 1. Press release button 2. Plate pops up 3. Slide out from holes 4. Lift plate out |
Cooking Up Waffle Magic
Now for the fun part – making breakfast! Here are my tips for waffle success with the WAF-300.
Dial in the Perfect Browning
The temperature dial goes from 1 (lightest) to 6 (darkest). For ideal golden brown waffles, I like to set it to 4 or 5. Start there and adjust depending on your taste.
Don’t Peek!
It’s tempting to sneak a peek, but lifting the lid too soon can make your waffles soggy. Trust the indicator lights and tone instead.
Use the Right Amount of Batter
I’ve found 1 1/2 cups of batter evenly fills the lower grid for a four-slice batch. Over-mixing makes dense waffles, so avoid that temptation too!
Spread It Out
Pour the batter into the center, then use a heat-proof spatula to spread it evenly to the edges so the whole grid fills up.
Make Waffles to Order
Freshly cooked waffles right off the grid are crispy perfection. If you must make them ahead, keep warm in a 200°F oven.
Allow to Cool Before Freezing
Let waffles cool completely, then wrap in waxed paper and plastic before freezing. Reheat in the toaster for crispy, tasty results.
| Waffle Cooking Tips |
|---|
| Set temperature to 4 or 5 |
| Don’t lift the lid prematurely |
| Use 1 1/2 cups batter |
| Spread batter evenly |
| Cook waffles fresh to order |
| Cool completely before freezing |
Keeping the WAF-300 in Tip-Top Shape
I want my waffle maker to last a lifetime, so proper care is essential. Here are my tips for cleaning and storing the WAF-300.
Cleaning the Plates in the Dishwasher
After cooking, I unplug the machine and let it cool completely before handling (at least 30 minutes). Then I pop out the plates and toss them in the dishwasher. So convenient!
-
I use my dishwasher’s normal wash cycle to clean the plates. No need for anything heavy-duty.
-
I make sure to scrape or wipe away any stuck-on batter or residue before placing in the dishwasher. This prevents it from baking on.
-
For detergent, I use a standard dishwasher pod or liquid. Again, no need for harsher industrial cleaners.
-
I place the plates on the top rack of my dishwasher, spread out with ample space around each.
-
If needed, I’ll give the plates a quick rinse beforehand if there’s a lot of batter stuck on. But usually the normal cycle takes care of it!
For the exterior, I wipe it down with a soft dry cloth. No abrasives or harsh scrubbing which could scratch the sleek stainless steel.
Store It Upright
When not in use, I store the WAF-300 upright with the plates inserted and cord wrapped neatly in the back. This saves a ton of counter space!
I can also stand it on its back end with the control panel facing up. Either way works great.
Don’t Immerse
Important – never immerse the cord, plug or base in water or other liquids. That’s a surefire way to fry its circuits.
Call the Experts
For any repairs or servicing, I let the authorized Cuisinart folks handle it. Don’t want to risk damaging this baby!
Ordering Replacement Plates
With removable plates, it’s easy to order replacements if needed down the road. Cuisinart has all the parts on their website.
-
Cuisinart sells replacements for all the WAF-300 plates on their website.
-
They have the upper and lower waffle plates, plus the upper flat and lower slotted pancake plates available.
-
I bookmark the page with the plates and accessories so I can easily find it if needed.
-
The plates run about $23-$37 each. A small price to pay to keep my waffle maker in service!
-
When ordering, I make sure to select the correct plate types – double check the upper or lower and waffle or pancake designations.
-
I also verify the WAF-300 model number to ensure compatibility.
-
Cuisinart ships the plates quickly, and I have my waffle maker back up and running in no time!
Proper care keeps my waffle maker cranking out the goods year after year. Now who’s ready for brunch?
| Cleaning Tips | Storage Tips |
|---|---|
| Unplug and allow to cool before cleaning | Store upright with plates inserted |
| Remove plates and wash in dishwasher | Stand on back end to save space |
| Wipe exterior with soft dry cloth | Wrap cord neatly when storing |
| Never immerse base, cord or plug in liquid | Order replacement plates if needed |
Parting Thoughts on My Beloved Waffle Maker
Well, there you have it – everything you need to know about removing those plates from the Cuisinart WAF-300!
I hope this guide gave you insight into taking care of this versatile breakfast machine. With easy plate removal, cleaning, and storage, it will be cranking out fluffy waffles and diner-style pancakes for years of weekend feasts.
Here are a few key tips to remember:
- Insert plates by lining up the pegs and pushing down until they click into place.
- Remove them by pressing the release button and sliding the plates out the holes.
- Check the upper/lower and waffle/pancake markings when swapping plates.
- Wash removable plates in the dishwasher after cooking.
- Store upright to save space and wrap the cord neatly.
| Key Removal Tips |
|---|
| Align pegs when inserting |
| Press button firmly to release |
| Check plate markings |
| Wash in dishwasher |
| Store upright with cord wrapped |
